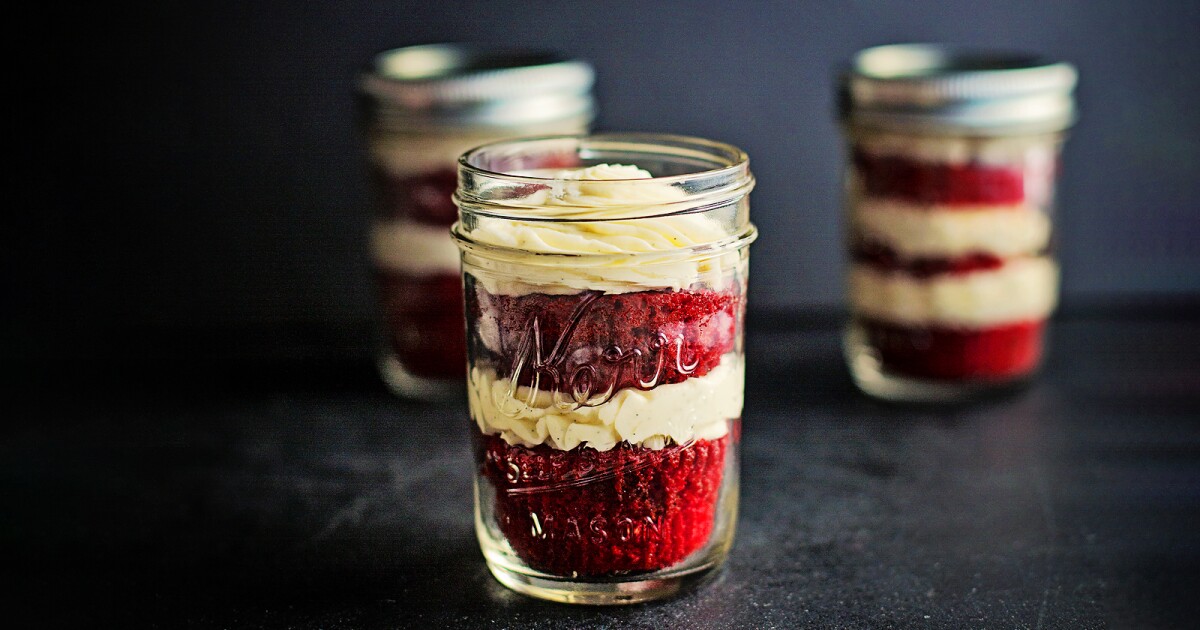
Where did December go? Christmas is just two days away. TWO DAYS. How’s your gift prep going? Got everyone covered? Or did you forget about the neighbors down the street who always leave a tin of cookies or a potted plant on the porch for you on Christmas Eve? If so, I’ve got a sweet idea that’s great for those last-minute gifties: cupcakes presented in jars.
I love food gifts. I especially love it when I can present them in jars. It’s fun, easy and often economical (buy your jars in bulk at Walmart or Smart & Final for added savings). That’s the perfect combination I look for when developing gift ideas for my work teammates and neighbors. A few years ago, I decided my work gifts would be red velvet cupcakes with vanilla bean ermine frosting presented in a pint jar. The red was festive, the frosting reminiscent of snow, and the cake itself stirs a load of favorite holiday memories.
Every Christmas when I was young, Mom would make a red velvet layer cake (I’ve previously shared her holiday walnut cake recipe in this space). Whereas most recipes call for a scant 2 tablespoons (1 fluid ounce) of red food coloring, Mom’s recipe calls for 2 fluid ounces (4 tablespoons) of red food coloring to make the richest, brightest red cake. We kids loved the color because it screamed Christmastime.
Fast forward to my college years: I’m at a bakery in San Francisco and I see a slice of red cake in the display case, and that’s when I learn that the rest of the world knows Mom’s Christmas cake as red velvet cake. Of course, I bought a slice. Though it lacked the rich coloring and had cream cheese frosting instead of the deliciously silky ermine frosting Mom used, it tasted close enough to her Christmas cake that suddenly I didn’t feel like I was 500 miles away from home.
Contrary to what some may think, red velvet is not a chocolate cake with red food coloring. Chocolate cake has anywhere between ⅔ of a cup to 1 cup of cocoa powder. Red velvet is a lightly chocolate-flavored cake, containing a mere 1 to 3 tablespoons of cocoa, depending on which recipe you follow. I’m also a firm believer in the addition of vinegar mixed with the baking soda, then quickly folded into the batter for added lift and a whisper of tang in the cake itself.
When it comes to frosting a red velvet cake, there are two camps out there: those who love it with cream cheese frosting and those who don’t. I’m in the latter camp. I am not a food historian or trained pastry chef, so I can’t say when cream cheese entered the equation. Mom’s version of red velvet came from the same little vintage cookbook, printed sometime in the late ‘50s or early ‘60s, that I mentioned in my walnut cake story two months ago.
June Crosby, Bing’s sister-in-law, wrote the cookbook, which calls Mom’s Christmas cake a “Red, Red Cake with Snowdrift Frosting” — also called old fashioned frosting, ermine frosting or boiled milk frosting. Old fashioned frosting is made by boiling milk and flour to a pudding consistency. Once cooled, it’s whipped into creamed butter for an incredibly smooth, light-tasting frosting similar in texture to whipped cream. And unlike traditional buttercream, ermine frosting is not overly sweet.
My mom’s version of this frosting recipe uses less flour than some ermine recipes I’ve seen. I like to start it by placing the milk and the flour in a jar and vigorously shaking it for 1 minute to incorporate the flour in the milk. Then I transfer it to a small saucepan and heat it on low, whisking continuously, for at least 5 minutes or until the mixture thickens like pudding. My mom would add the milk and flour to the saucepan at the same time and just started whisking. I felt I got fewer lumps doing it my way, though; both methods should get you the same result.
Once it’s thickened, it gets transferred to a bowl, the salt and vanilla get whisked in, and it’s covered with plastic wrap to keep a skin from forming. It needs to be cooled thoroughly before beating it into creamed and whipped butter, but it should be at room temperature, not straight-from-the-refrigerator cold, before adding a spoonful at a time to the butter.
This old fashioned frosting is light and divine. And in my book, red velvet needs this frosting, not cream cheese frosting, which obliterates the delicate, slightly tangy taste of the red velvet, coating your mouth in that thick, cheese flavor that seems so wrong. And before you start thinking I’m a cream cheese hater, let me say for the record that my second favorite baked dessert is cheesecake. My third is carrot cake with cream cheese frosting. So, see? I do believe there is a time and place for cream cheese. Just not on red velvet cake.
These red velvet cupcakes in jars make gorgeous gifts, but if you can’t get hold of jars at such late notice, they make lovely traditional cupcakes, as well.
Tips for success
- Ensure that the butter for both the cake and frosting is just at room temperature and not overly softened. This is especially important for the frosting, because butter that is so soft that it’s starting to get greasy will result in a frosting that is greasy tasting and too soft. Take the butter out of the refrigerator about 45 to 60 minutes before you plan on starting.
- To measure out the flour, fluff it with a large spoon and then spoon it into the measuring cup, leveling it off with a knife. Never stick the measuring cup directly into the container of flour to scoop it up. Doing so compacts the flour, giving you more than the required amount (resulting in baked goods that are on the dry side).
- If you choose to forgo the cupcake liners, use a baking spray instead of a cooking spray. Baking sprays have flour incorporated into the oil.
- The cooked flour mixture must be thoroughly cooled to room temperature — and not cold from the fridge — before beating it into the whipped butter for the frosting. If it’s too warm, it will melt the butter; too cold, and it won’t combine properly, and you risk a grainy texture.
- I find that the frosting works best with whole milk.
- If your frosting is grainy, continue mixing with the paddle on low for up to 10 minutes; this should smooth it out as well as stiffen it enough to pipe.
- If the frosting is too soft to pipe, refrigerate it for 15 to 20 minutes, then give it a quick 30-second whip on low before transferring it to a piping bag.
- Use a wide mouth, half-pint canning jar for presentation.
- The frosting will be fine at room temperature for up to a day. Refrigerate the frosted cupcakes for extended storage. Because the frosting has butter, leave the cupcakes on the counter for at least 20 minutes before eating.
Red Velvet Cupcakes in a Jar With Vanilla Bean Old Fashioned Frosting
You can refrigerate the boiled milk to cool it down faster but be sure to let it come up to room temperature for at least 30 minutes before incorporating it into the creamed butter.
FOR THE CUPCAKES:
2 ounces red food coloring
3 tablespoons good quality cocoa powder
1 cup (1 stick) unsalted butter (see Note), room temperature but not overly softened
1 ½ cups granulated sugar
2 eggs, room temperature
1 tablespoon vanilla extract
2 ¼ cups cake flour (you can use all-purpose, but the crumb isn’t as nice)
1 teaspoon salt
1 cup buttermilk, room temperature
1 tablespoon white vinegar
1 teaspoon baking soda
FOR THE FROSTING:
3 tablespoons flour
1 cup whole milk
1 teaspoon vanilla extract
Pinch of salt
1 cup unsalted butter, room temperature
1 cup granulated white sugar
1 whole vanilla bean
FOR ASSEMBLY:
Half-pint wide mouth jelly jars, washed and dried
Piping bag with a star tip
Optional: labels, small plastic spoons, ribbon or raffia
For the cupcakes: Preheat oven to 350 degrees. Place the racks in the upper and lower thirds of the oven. If using cupcake liners, prepare cupcake tins with cupcake liners. If not, wait to lightly spray pans with nonstick baking spray until just before adding batter.
Make a paste with the food coloring and cocoa in a small bowl. Set aside.
Beat butter on medium speed with an electric beater or using the paddle attachment in a stand mixer until smooth, about 5 minutes. Add sugar and beat until light and fluffy, about 5 minutes. Add the eggs one at a time, beating well, incorporating fully after each addition. Add the cocoa paste and the vanilla, beat until well combined. Set aside.
Sift flour and salt together in a large bowl. Add a third of the flour into the butter and sugar mixture. Beat on medium speed until incorporated. Pour in half of the buttermilk and beat again. Add the second third of the flour, beating until mixed well. Pour in the rest of the buttermilk and beat. Add the last of the flour and beat until well incorporated.
Pour the vinegar into a small glass bowl or cup. Stir in the baking soda (it will fizz), quickly pour it over the batter and gently fold it in by hand with a rubber spatula.
If not using cupcake liners, lightly spray two 12 count cupcake pans with nonstick bakers spray. Using an ice cream scoop, place one level scoop of batter into each cavity, making sure to only fill to ⅔ full. (I use a #24 food scooper — 1 ⅓ ounce — and one level scoop is perfect. I picked up mine at Smart & Final.)
Bake for 18 to 22 minutes or until a toothpick inserted comes out with just a few red crumbs stuck to it. Remove from oven and allow to sit in the pan for five minutes. If not using liners, run an offset spatula or butter knife along the edge between the cake and pan to loosen. Gently lift the cupcakes out and cool completely on a wire rack.
Make the frosting: Vigorously shake the flour and milk together in a jar for one full minute. Pour into a small saucepan and whisk continuously over low heat until the milk has thickened to a pudding-like consistency, about 8 to 10 minutes. Remove from heat and whisk in the vanilla extract and salt. To keep a skin from forming as it cools, cover with plastic wrap or parchment paper, making sure that it comes into contact with the surface. Set aside to thoroughly cool.
In the bowl of a stand mixer with the paddle attachment, beat the butter on medium speed until light and smooth, about 5 minutes. Add the sugar and cream on high for 8 to 10 minutes until light and fluffy, stopping to scrape down the sides as needed. Split the vanilla bean down the center lengthwise and scrape the seeds into the creamed butter. Beat to incorporate. Add the boiled milk base to the creamed butter two heaping tablespoons at a time, making sure to beat well between additions. Continue to beat on low speed for 10 minutes to smooth out the frosting completely.
To assemble: Prepare a piping bag with the tip. To make it easier to fill, place the bag in a large tumbler or glass and fold over the bag’s top onto the glass. Add two heaping spatulas worth of frosting into the bag. Set aside.
If you used cupcake liners, remove liners from cupcakes. Place one cupcake in the bottom of a clean, dry jar. Using your dominant hand, twist the top of the piping bag to gently push the frosting toward the center of the bag, down toward the tip, then pipe a layer of frosting over the cupcake. Add a second cupcake to the jar, pushing it down into the frosting. Top with a pretty swirled layer of frosting. If the second cupcake is too large to allow for a second layer of frosting, slice the cupcake in half and only add half the cupcake to the jar. Gently press it down, then frost as pretty as you can. Repeat for remaining jars/cupcakes.
Screw all the caps tightly onto the jars. Add labels and tie the spoons onto the jar with ribbon, raffia or baker’s twine. Your pretty cupcakes in a jar are now ready for gift giving.
The cupcake jars can be left out overnight in a cool spot or stored in the refrigerator for up to five days.
Note: If you use salted butter, omit the salt listed in the recipe.
Recipe is copyrighted by Anita L. Arambula from Confessions of a Foodie. Reprinted by permission.
Arambula is the food section art director and designer. She blogs at www.confessionsofafoodie.me, where the original version of this article published. Follow her on Instagram: @afotogirl. She can be reached at anita.arambula@sduniontribune.com.
Note: Changes to the Full-Text RSS free service
"sweet" - Google News
December 23, 2020 at 09:00PM
https://ift.tt/3pvXQbN
A sweet and pretty idea for a last-minute food gift - The San Diego Union-Tribune
"sweet" - Google News
https://ift.tt/2PcPlld
https://ift.tt/2KSpWvj
Bagikan Berita Ini


0 Response to "A sweet and pretty idea for a last-minute food gift - The San Diego Union-Tribune"
Post a Comment